
If you encounter an issue on your site requiring an increase in the WordPress memory limit, don’t worry—this can be easily resolved by editing your wp-config.php file. Follow the steps below to get it done:
⚠️ Important: Always back up your website before making changes to critical files likewp-config.php.
Steps to Increase WordPress Memory Limit
1/ Access Your WordPress Files
Use an FTP client or your hosting file manager to navigate to your website files.
2/ Locate the wp-config.php File
You’ll find this file in the root directory of your WordPress installation.
3/ Open the File for Editing
Right-click the wp-config.php file and select Edit or Open.
4/ Find the Following Line:
/* That's all, stop editing! Happy publishing. */5/ Add the Memory Limit Code
Insert the following line of code right above the line mentioned in Step 4:
define('WP_MEMORY_LIMIT', '256M');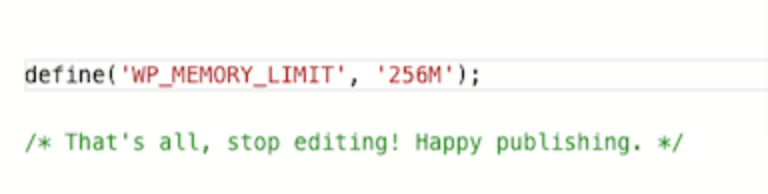
6/ Save the File
Once you’ve added the code, save your changes.
Congratulations!
You’ve successfully increased your WordPress memory limit. This change will help prevent memory-related errors and ensure smoother performance for your site.